synosine
Intro
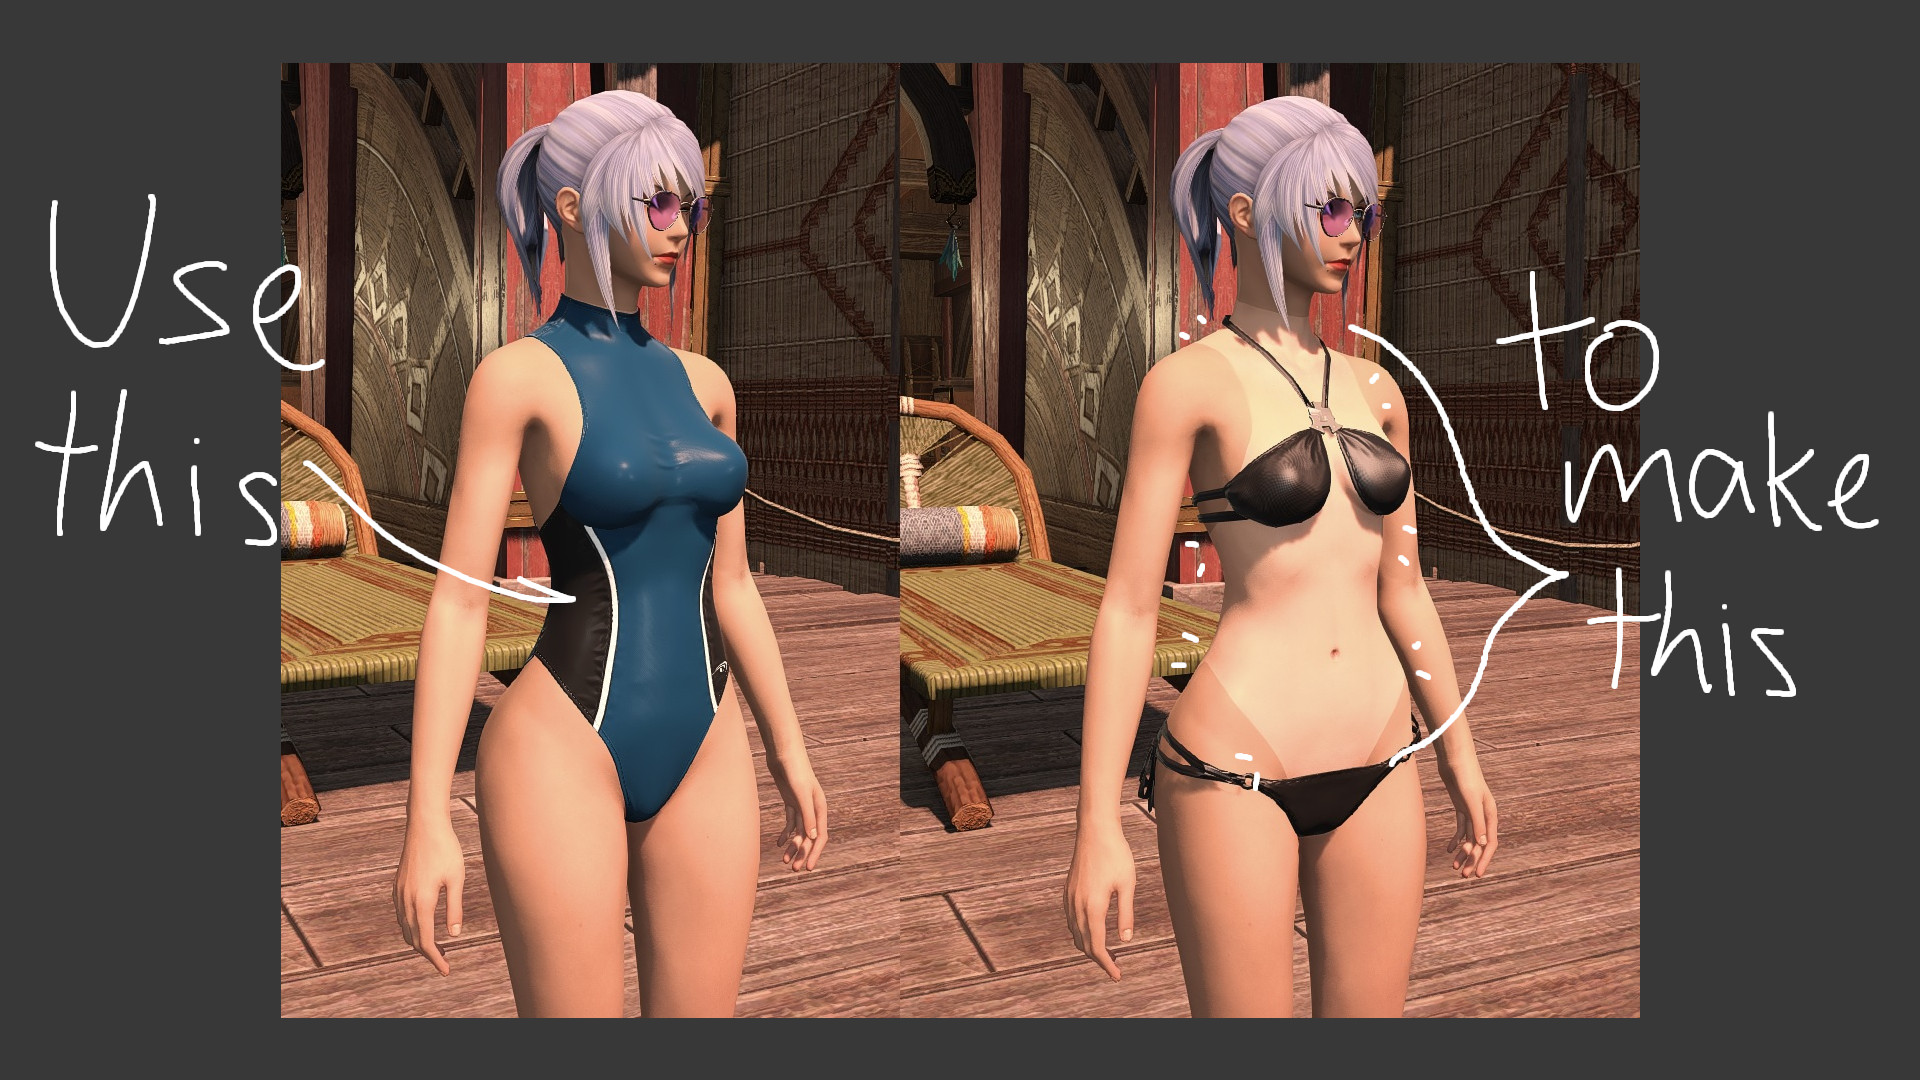
This guide will walk through the creation of a skin tan mod from equipped gear. You’ll get the best results by using a single skin layout (typically Bibo+ or Gen3). It’s possible to combine layouts, but that’s beyond the scope of this guide, though I will touch on how it’s done. To achieve the tanline effect, the mod modifies the skin texture that affects skin pigmentation in FFXIV. This is how the game colors the skin texture based on the character’s selected skin color, so creating the tan effect is as simple as selecting a darker tone in Glamourer.
Requirements
- Blender (I’m on 5.1+ but as long as it supports MeddleTools it should work)
- Meddle and MeddleTools
- Penumbra and Glamourer
- Image editor of your choice (I use GIMP here)
Some very basic knowledge of Blender is assumed, but I will try to walk through as much as possible.
Exporting the character model
Open the Meddle plugin in FFXIV. It should open to the Character tab with something like this:
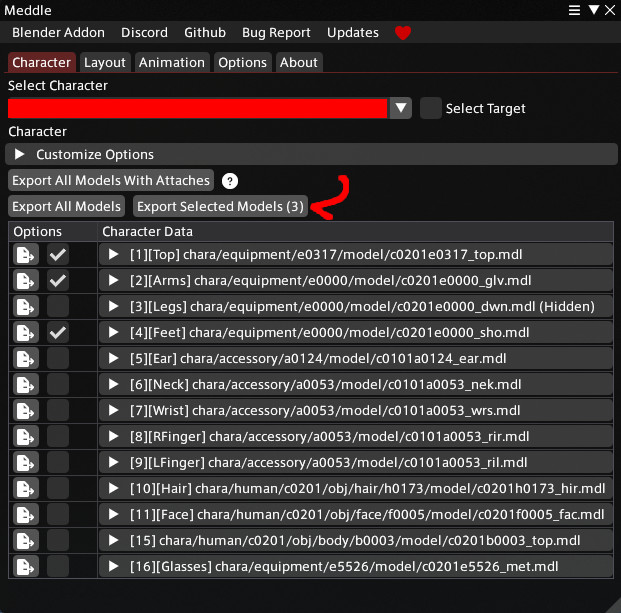
Make sure your character is equipped with the gear you want, select the models you want to export, and click “Export Selected Models”. You only need to select models with skin elements that are not listed as “Hidden”, but you can add as much as you like. When exporting, change the “Pose Mode” to “Reference Pose” to simplify the export data, then export to a chosen directory. Wait for the export and you’ll get a folder with a .gltf file along with a bunch of other data.
Importing to Blender
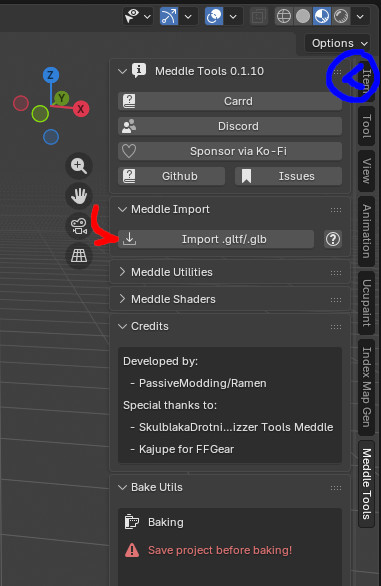
Open up Blender and delete everything in the default project (cube, camera, and light). Open up the Meddle Tools panel from the sidebar (you may need to click the arrow marked with blue). Import the .gltf file from the exported data.
You’ll probably get this monstrosity in the viewport:
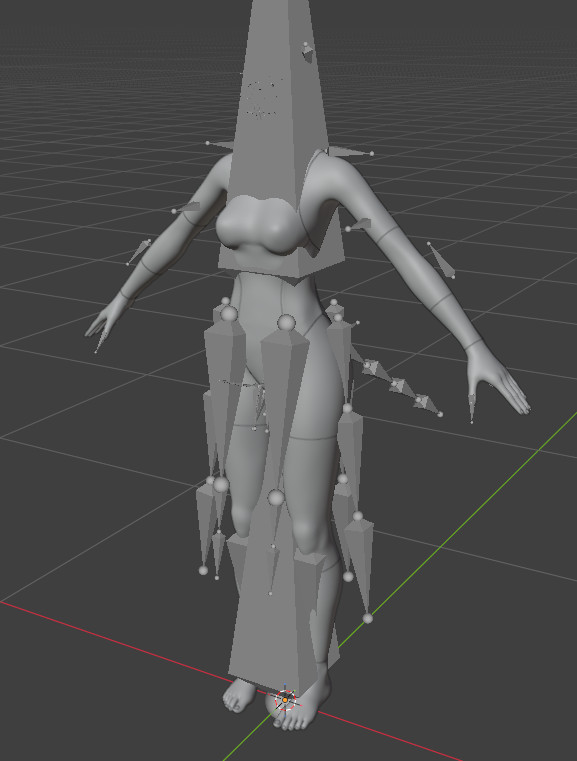
Click into the viewport options in the top right, disable visibility for Bones and click the Material Preview shading, and you should get a nice, cleaned up preview.
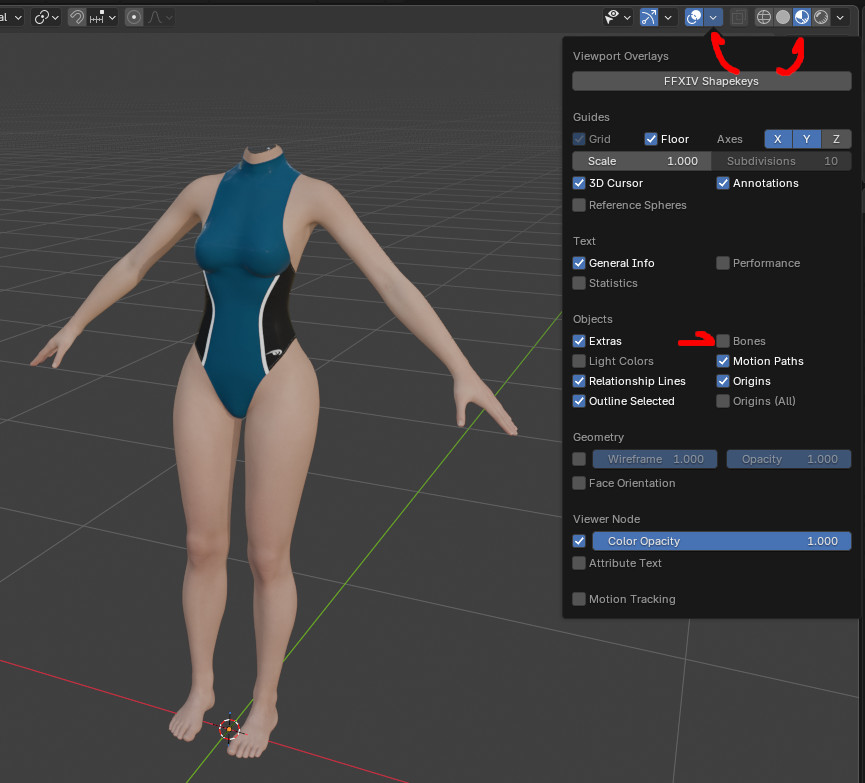
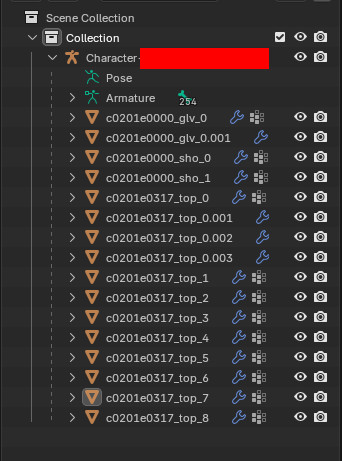
You may need to clean up some meshes, perhaps if there’s something you don’t want showing up or if there’s an invisible mesh (e.g. Better Pubes Framework support). Expand the Character group in the collection and click through the meshes to check if there’s anything you need to clean up. Right-click > Delete anything you don’t want.
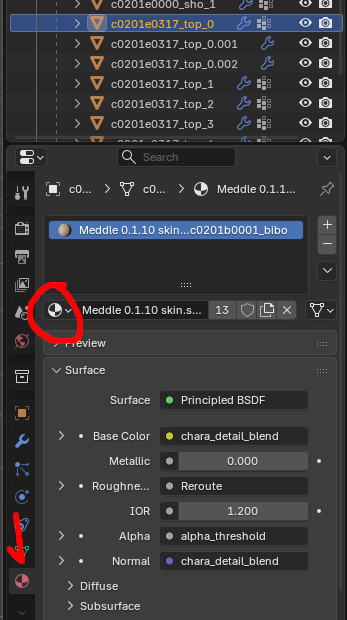
Some meshes may have a different material assigned to them. If you are not sure, it’ll show up more clearly later. Click into the Material Properties and make sure the same skin material is assigned to each skin mesh.
Rendering the Ambient Occlusion (AO) map
Blender can directly bake an ambient occlusion map, but I’ve found it can be very grainy. This technique produces a much cleaner result.
In Blender, click into the Shading tab at the top of the window. You should see a viewport along with a big mess of nodes at the bottom. Do the same thing as before in the viewport and disable Bones so you can see the model.
In the nodes area, hold down middle click and move to the right side near the Material Output node. From the menu bar, select Add > Texture > Image Texture to create a new node.
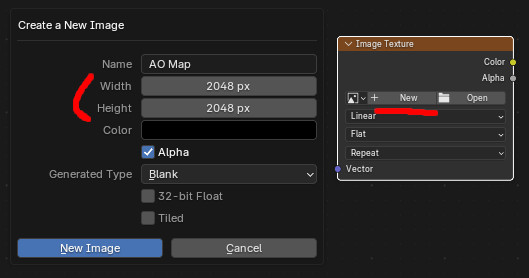
Create a new image, set a name and, for skin textures, you’ll want to match the size of your base skin texture (most likely 2048x2048).
After that, create 3 more nodes:
- Add > Input > Ambient Occlusion
- Add > Color > Color Ramp
- Add > Shader > Emission
Connect the nodes to each other by clicking and dragging the outputs so that it looks like this, making sure to connect the Emission output to the Material Output node:
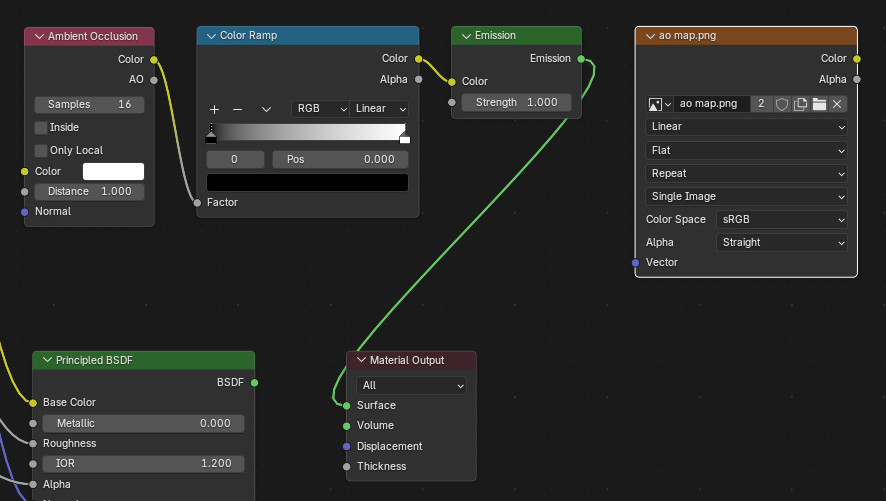
In the viewport, the skin should now show up as white with darker areas where shadows should be:
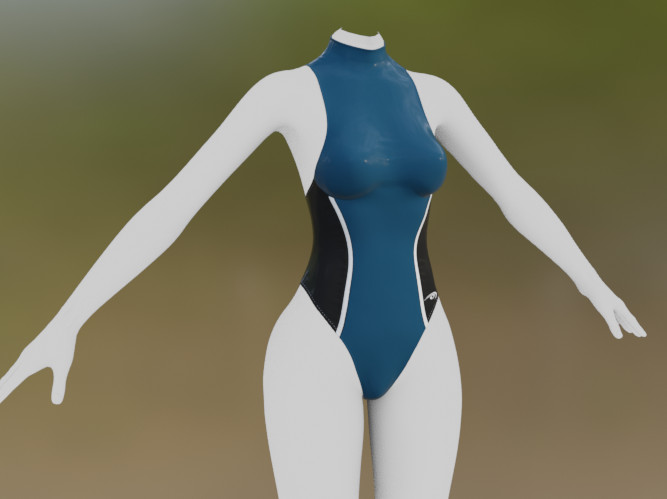
You can adjust the values in the Color Ramp node to your liking, but the defaults are fine. Now, select every skin mesh on the model, either by shift-clicking each part in the viewport or control-clicking in the collections panel. I found it easier to select everything then deselect the gear parts. Also make sure to select the Image Texture node you created before. It should have a white outline around it.
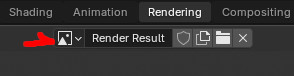
Now click to the Rendering tab at the top, and change the image to the one you created.
Change the render settings to the ones I have here:
- Render Engine: Cycles
- Device: If you have a GPU set in Blender properties, I recommend GPU Compute for faster rendering, but CPU is fine.
- Bake > Bake Type: Emission
- Color Management > View: Filmic
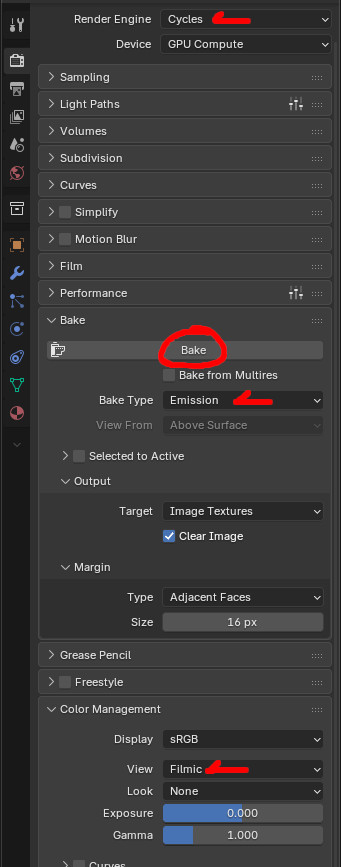
Once everything is set, click the Bake button, and wait for it to render.
If everything goes right, you should get a result like this:
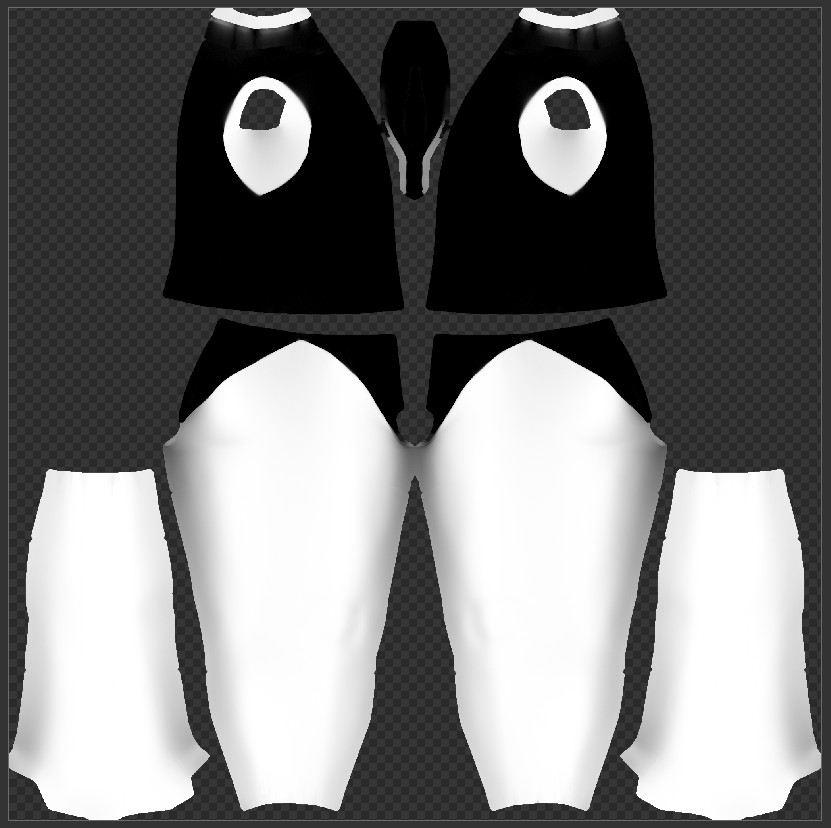
From the menu, click Image > Save As…, and save your AO map somewhere accessible.
Editing the texture
This AO map will be the base for your tanlines: white is your normal skin color, and black is the default base skin color. You will want to edit the black parts to be gray (closer to white) in order to preserve your selected skin color. Open the AO map in your image editor, and put it over a white background. Using the color levels adjustment in your editor (in GIMP this is Colors > Levels…), adjust the output levels to bring up the black into a gray.
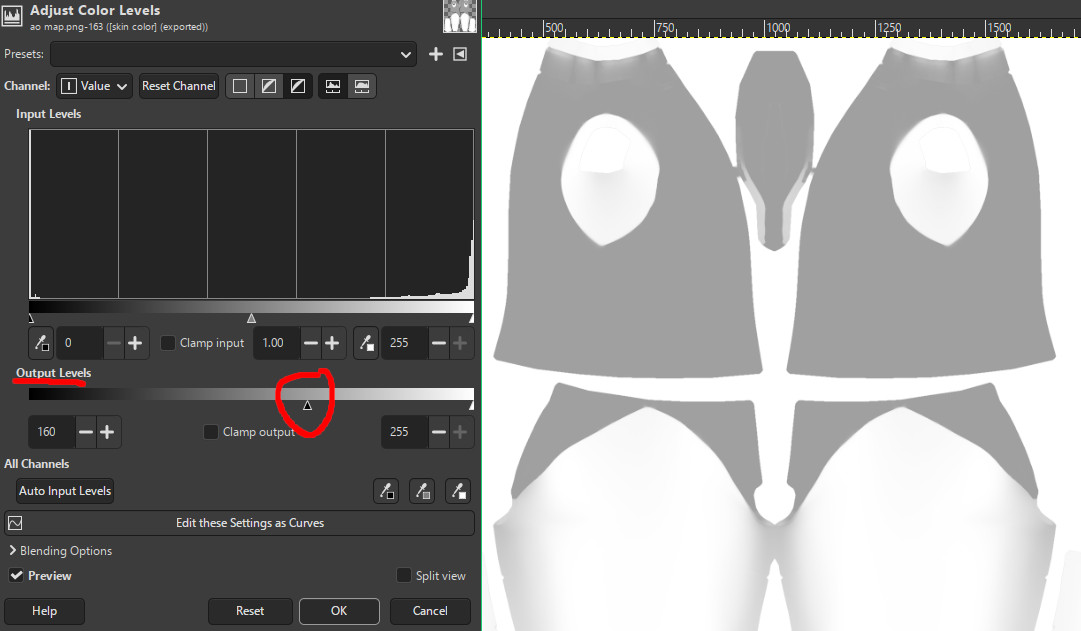
This is the setting that worked for me, but you may want to play around with it. Once you’re finished, export the image to a .png.
Creating the mod
In Penumbra, create a new, blank mod (+ button in bottom left) and open the Advanced Editing window. Click the Import from Screen tab, and navigate down to any gear with your skin material. Find the normal texture and click the right button to add a copy of the file to your mod.

Au ra and Hrothgar see the note below*
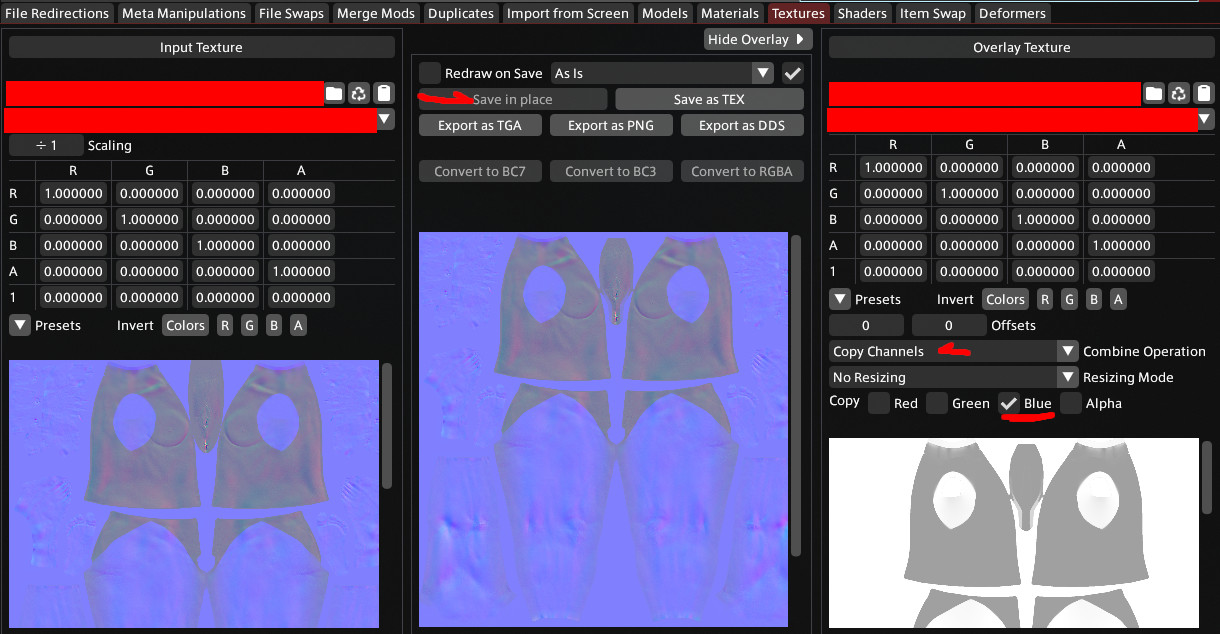
Click the Textures tab, and select the texture you just copied from the dropdown menu. Click the Show Overlay button in the top right, and select the edited AO map for the overlay. Change the overlay settings to Copy Channels, and enable only the Blue channel. If your AO map is somehow a different size than the normal map, you can resize it here, but I recommend going back to Blender and changing the size there. Once your output looks similar to the one in the screenshot, hold Control+Shift and click Save in place.
Au ra/Hrothgar Note
The above method does not work for Au ra/Hrothgar because their skin textures use the blue channel for scales/fur and will require additional work.
For Au ra
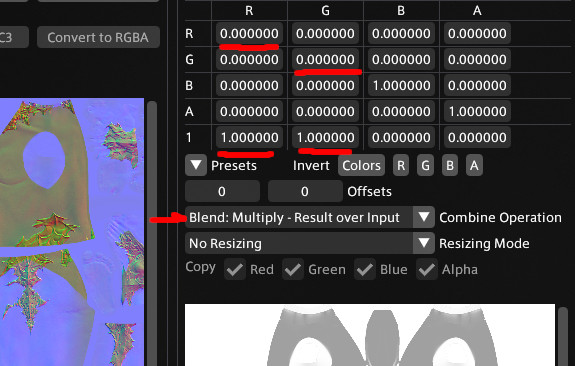
Use these overlay settings to apply your AO map to the normals. This has a side effect of also putting tan lines over scales, so you will need to mask out the scales in your map (set to white) using an image editor.
For Hrothgar
The au ra settings above will also work for hrothgar, but untanned parts (darker sections of the AO map) will also affect fur color. You will need to use the alpha channel from the normal map (white on fur, black on skin), to mask out areas of your AO map. Technically, hrothgar “skin” is all fur, so tan lines may not make sense, but it’s up to you.
Setting the tan
Enable the mod, making sure it’s in your active collection and at a higher priority than your base body textures. In Glamourer, set a darker skin tone to simulate the tan, and check to make sure the mod works.
If everything looks good, congratulations! You’ve successfully created tanlines from your equipped gear. If not, you will probably need to go back and adjust either the Blender output or image editing, but I believe in you!
Addendum: Porting to other skin layouts
if you mix skin layouts, or use gear using a different skin layout, you will need to generate a normal texture for each layout. In Blender, you will have different skin materials, so you will need to render a separate AO map for each one. If you want to port to another layout, the easiest is to use FFXIV Loose Texture Compiler to generate new textures from the one you created. Note that Gen2/Vanilla textures are symmetrical, so you will likely not get a good result.